
Encroaching Despair
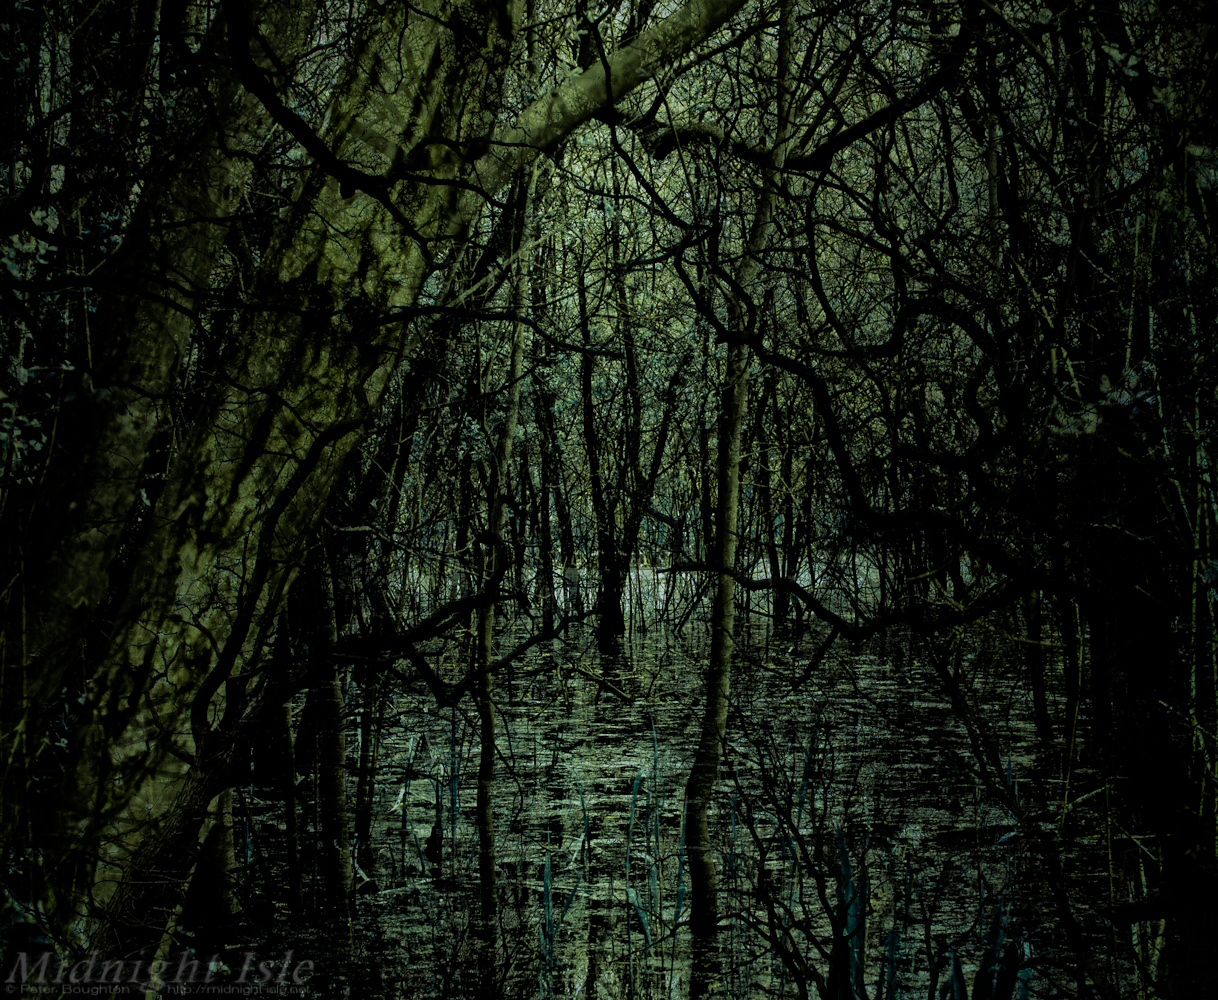
Sometimes it can be a long time between photographic capture and realisation of an image. This one began life back in 2012, whilst out walking along by a lake that had flooded and caused a swamp-like area amongst some trees, but it was a couple of years later before the image emerged.
I use a collection in Lightroom to keep photos with potential but that are not yet completed images (for whatever reason), every so often I look through what it contains to see if inspiration bites. This one sat there for a while until I figured it out, but was worth the wait.
I walk through the steps it took below, and show the key stages it went through. (After clicking an image, the left and right cursor keys can step you back and forward between the stages.)
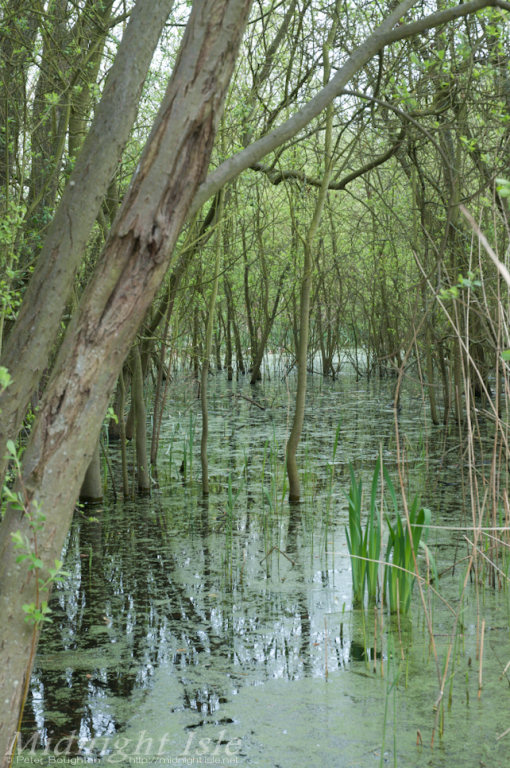
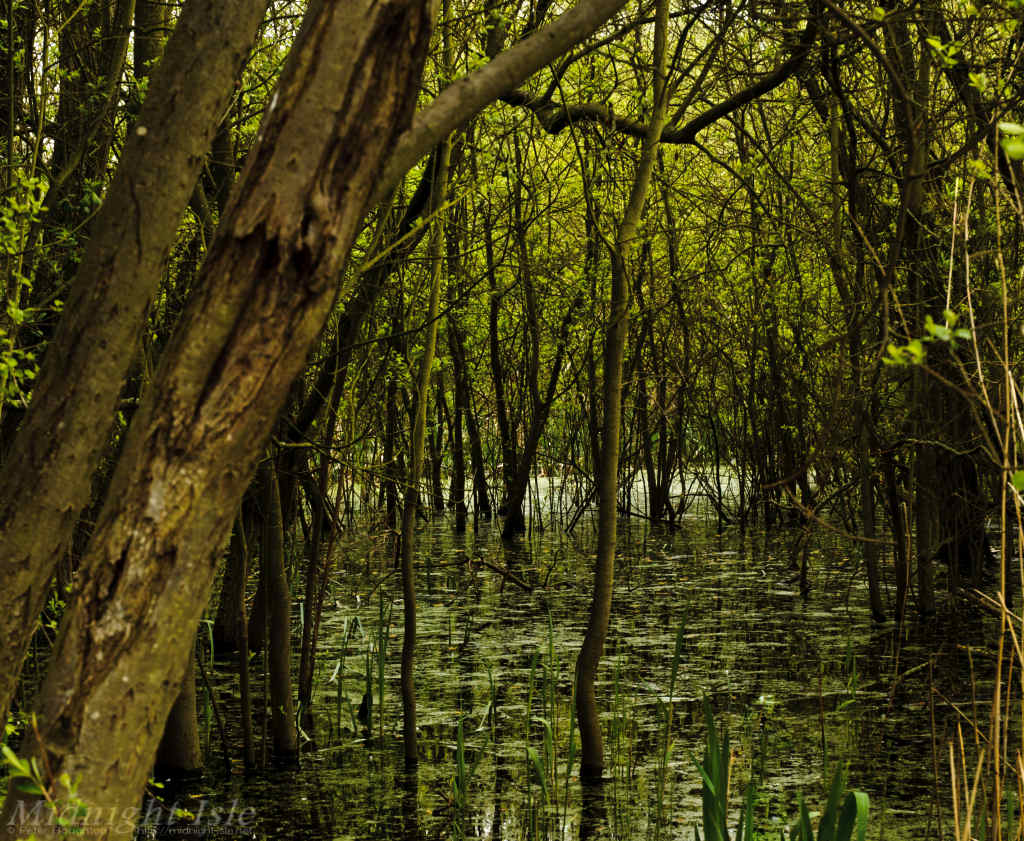
This first image was the only shot I managed to take of the scene - with more time I would have taken something better, maybe providing other images from the area, but more than likely reducing the work I needed to do in post production. Of course, in the end it doesn't matter where the work is done, but it does make sense to do it on whichever side of the shutter is easier to achieve the desired effect.
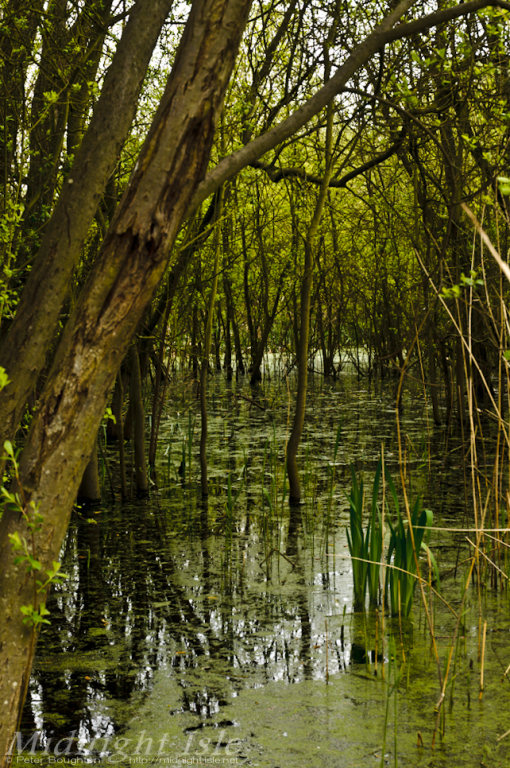
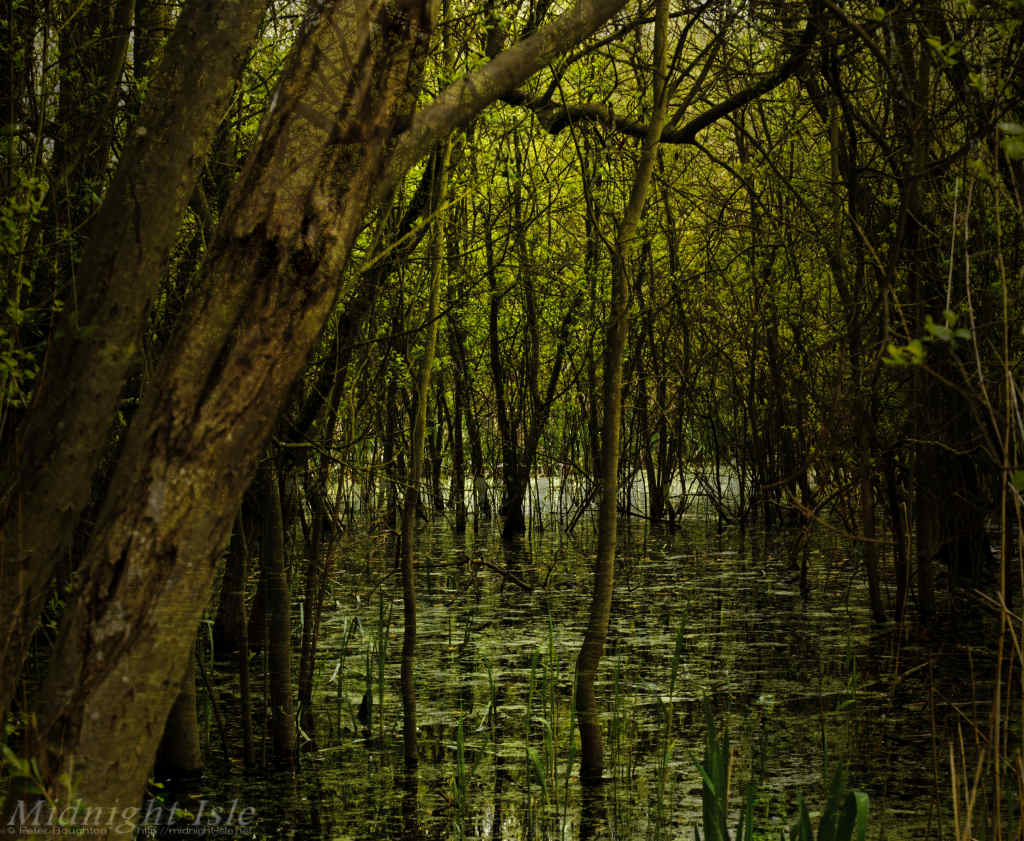
The image next to it shows the significant effect that simply fixing white balance and boosting constrast, clarity, and black clipping can have.
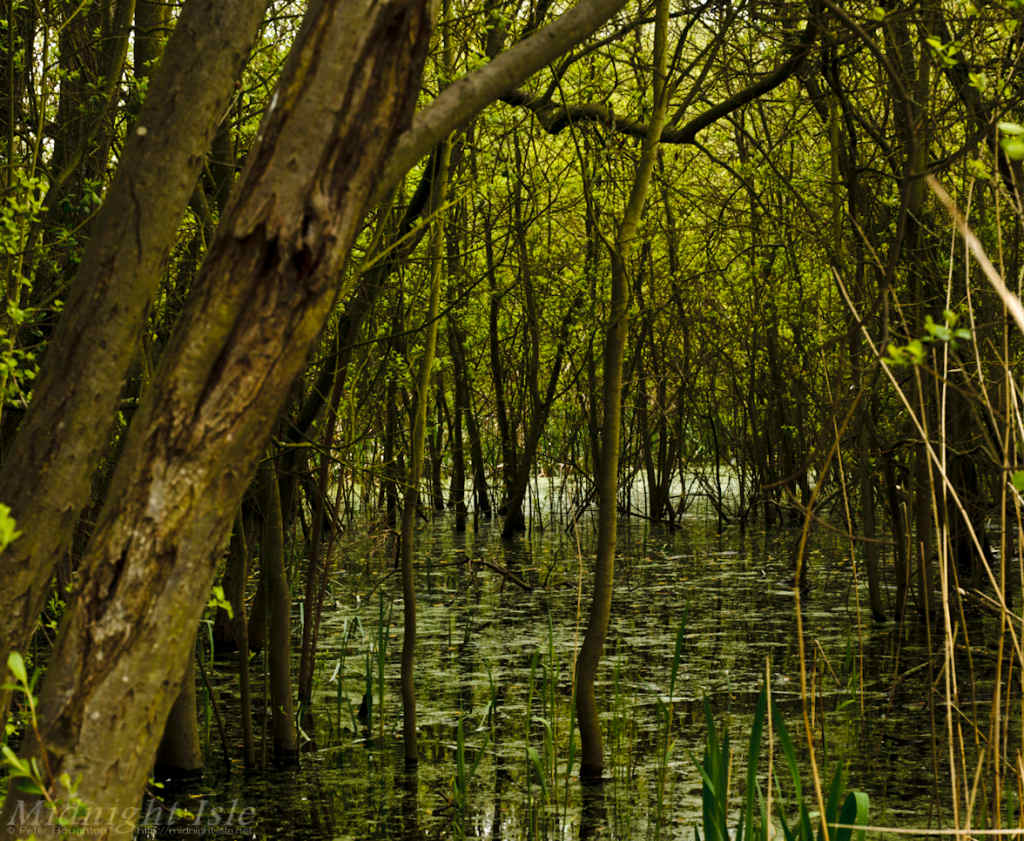
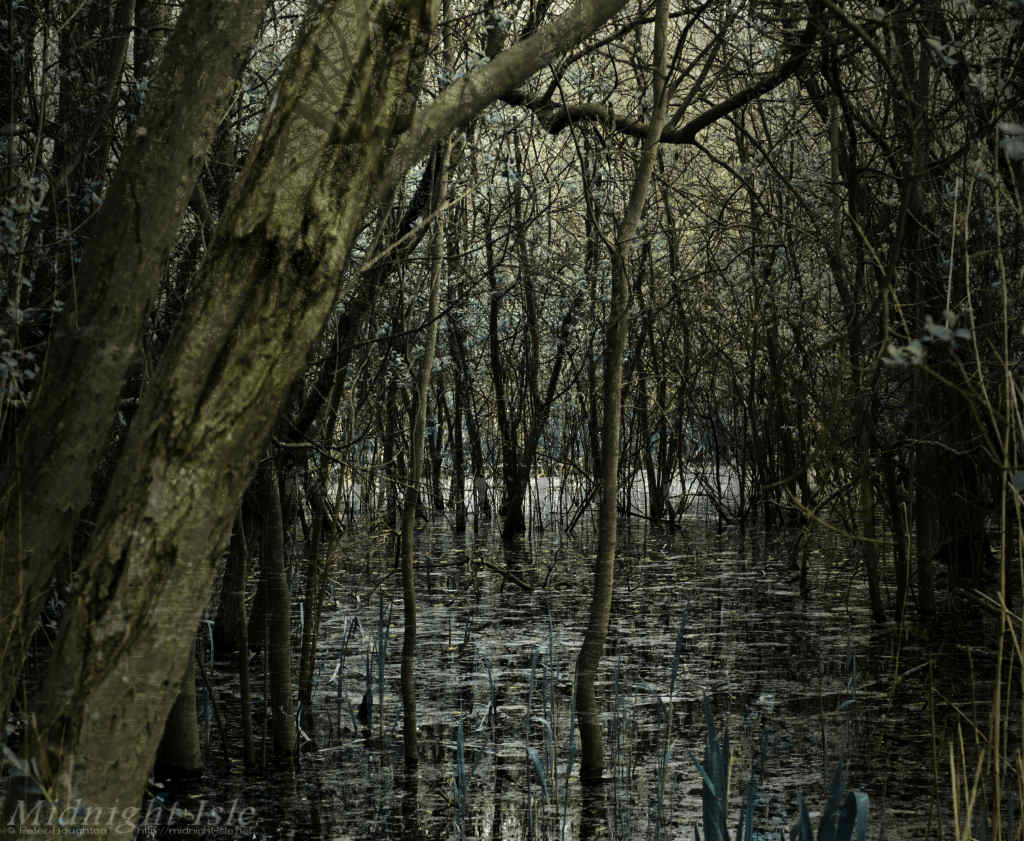
I experimented with half a dozen different crops and decided the foreground wasn't adding enough (below left), and then started doing some cloning with Lightroom, before realising what I was doing and switching to Paint Shop Pro X (below right) - again, a matter of using whichever tool makes a task easier.
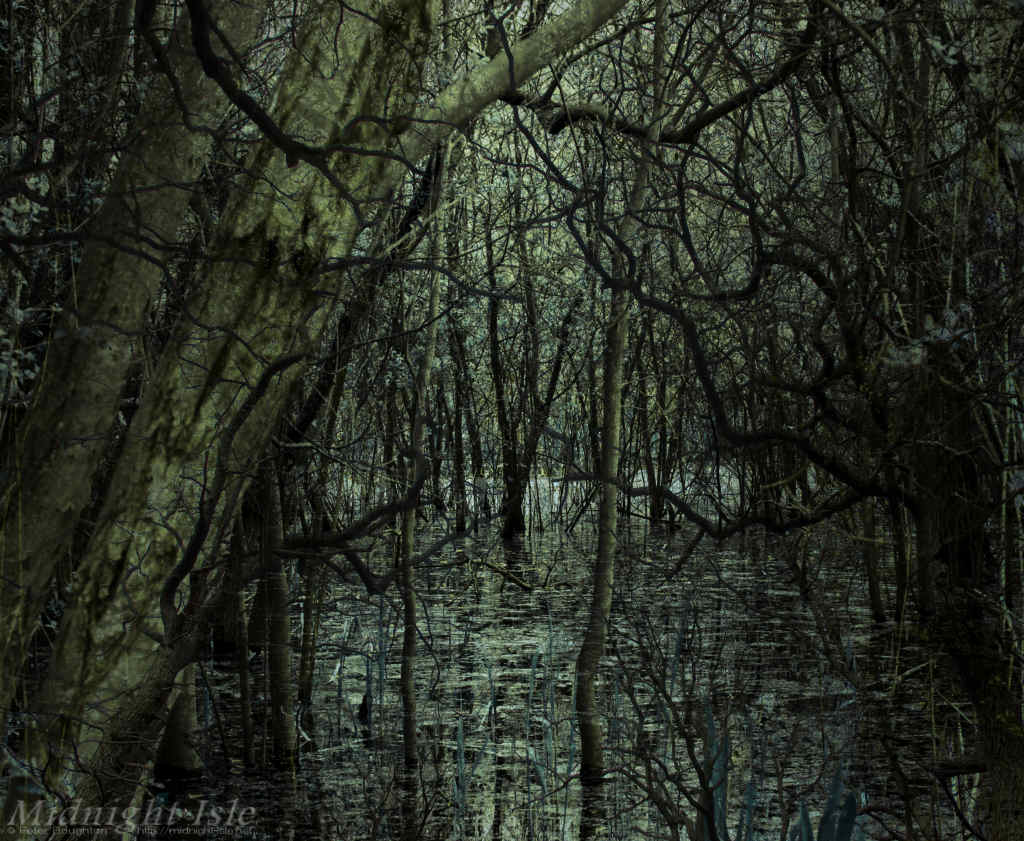
After removing unwanted reeds and distracting highlights, I duplicated the image, mirrored it, and layered it back with Hard Light blend mode. This has a subtle but significant effect to the feel of the image.
The image on the right shows this plus a Levels adjustment layer applied to just the edges of the image, reducing the highlights and overall brightness.
These steps all helped to move the image forward, but it was still not quite what I was after - too bright and saturated.
I addressed this by adding a HSL adjustment layer with hue set to a greenish-blue and blended using Lighten, to produce the result you see below left, followed by overlaying some dark twisted branches from another photo, plus a Curves adjustment layer to tweak things further.
That's better, but it's a bit close to a monochrome, and not what I want. Taking the image back in Lightroom I boost the contrast, reduce clarity, and add a gentle vignette (left), then adjust the tone curve, tweak the colours, and bring the brightness down (right).
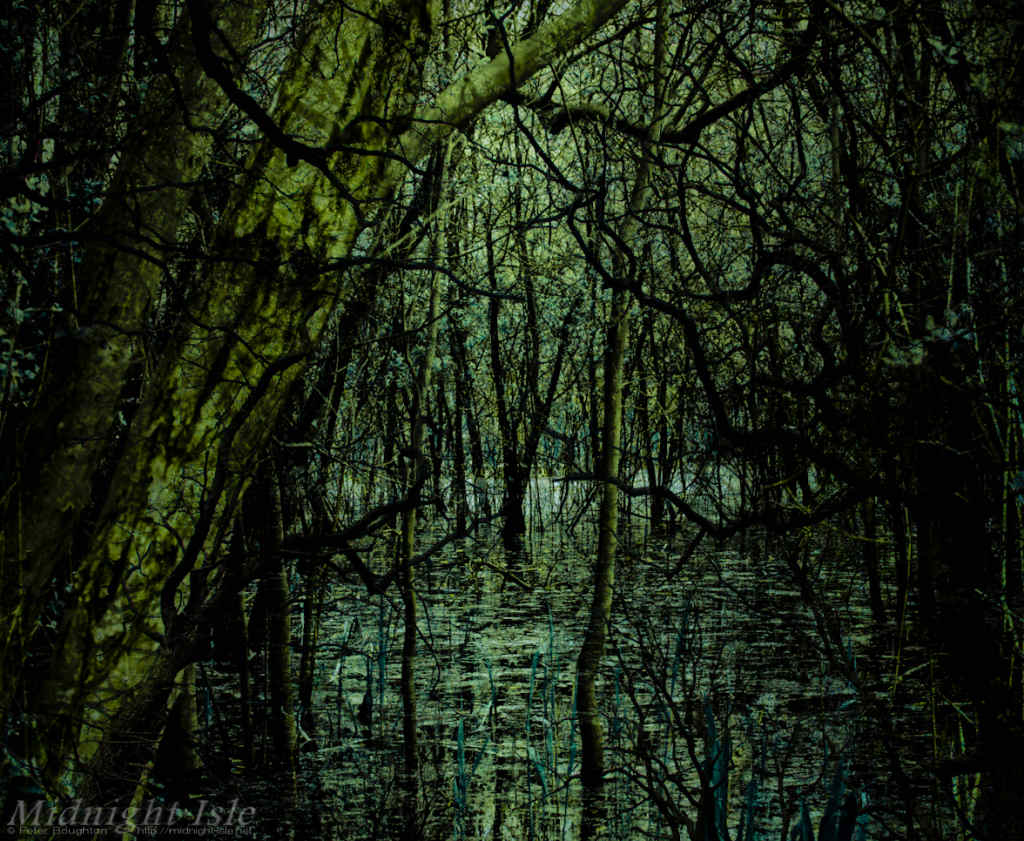
And there you have it - an image that is drastically different from the source photo, yet as you can see each step was a relatively minor change from the one before it.
Layers are a powerful feature, with the ability to transform an image in ways you might not consider. Experimentation is key to understanding their versatility - after a while you begin to build an understanding of how they affect an image, but if you're not sure give it a try, check all the different blend modes and adjustments and see what they do in different situations.